Friday, 19 September 2014

Squishy Cowl

I loooooovvee this cowl, its so soft and squishable which is just what is needed for the winter.
worked in the round this is the simplest crochet cowl ever, Its done on a 12mm hook but a 10mm will do, also using chunky. IT will turn out slightly smaller. ENJOY!


Super Chunky Cowl

USA TERMS 

Super chunky  2 x 100g balls. 
Approx 150m 


pattern here


Wednesday, 17 September 2014

Stash Blanket - rectangle granny stitch blanket


                                                              STASH BLANKET


I have way too much yarn...................
Quarter balls, half balls scraps everywhere, yes i am a yarn hoarder. Well its time for a clear out, i just cant keep buying storage boxes. They are starting to take over the house !
 I have years of leftover yarn of all weights, the yarn with no band on would be too hard to recognise or match up to be turned into a garment so I've sorted all this yarn together to try come up with a project big enough to incorporate all the stash and make some room in the house. So if i use it all up ill have room for new yarn , makes sense, right?


                          Buy Pattern Here


Granny stitch blankets are so easy and fast to work up. I got my daughter Rachel (12) and her friend Nadine (11) to pick what colours they wanted for a blanket each. Rachel picked all pastel shades and Nadine went for the stronger colours. I decided to size them for the girls according to their height so the blankets go from head to toe. They ended up near enough to a single/twin bed size. which i reckon would take 12 x 100g balls.


I used 100% acrylic yarn, not all the yarn was the same weight, each blanket has dk, aran, chunky and 4 ply. I was delighted that i didn't end up with lumps and bumps or any pulls from working the different weights together. The entire blanket was done on a 4.5mm hook.
One thing to bear in mind is to place similar weights next to each other i.e after a row of 4ply use a dk yarn not aran or chunky. The majority weight used was dk.
I did try to match the colours in sequence but as the rounds got larger some of the smaller quantities wouldn't complete a round, so i mixed and matched as best as i could.


I do suggest not mixing fibres and using the smaller amounts of yarn 1st as a smaller amount will go further.

I am delighted with the end results and have already starting the next stash blanket using all my blue shades, it wont be as big but i cant wait to see how the colours work together.

If you keep going with this it will work out the size for a single/twin bed. It is very straight forward and easy to follow. A perfect way to use up your stash!
                                              -------------------------------------------


Finished Items may be sold, Pattern is not for resale.
All contents © 2014 Sinead Deegan Designs. All rights reserved.  


Thursday, 28 August 2014

Ladies crochet fingerless gloves


                                          LADIES CROCHET FINGERLESS GLOVES


I love fingerless gloves, I always have. Chunky, Aran or DK it doesn't matter. Best thing about being able to knit and crochet is creating your own style of winter items. Matching sets of a hat and gloves or a hat and cowl from a 100g ball of yarn , nothing beats it!
I've come up with 2 patterns for fingerless gloves in aran weight and dk. I have to say the aran is my favourite, that bit warmer. It's worth using an extra soft yarn to give you more pleasure from yarn your latest creation.
Both patterns are very easy to follow and perfect for your first glove pattern.Showing 1 worked as a flat piece then seamed and the other is worked in the round. There is also an easy to follow sizing guide to show you how to create your own design using whichever stitch you prefer.
They are so quick to make up, I made 3 pairs in  one day !


Autumn Sparkle Gloves (seamed)


SIZING GUIDE
YOU ONLY NEED 3 MEASUREMENTS
1ST IS FROM THE KNUCKLE TO THE BASE OF THE THUMB.
2ND IS FROM BASE OF THE THUMB TO THE POSITION ON WRIST, FOR THE LENGTH.
3RD IS FOR THE WIDTH, SO MEASURE THE WIDEST PART, WHICHEVER IS WIDEST INCLUDING HAND AND WRIST/ARM.
MY GLOVES ARE APPROX. 7.5IN WIDE, 8IN LONG.
TO CHANGE THE SIZE OF THUMB HOLE JUST ALTER THE CH MADE FOR THE HOLE.
                                                Vintage Look Gloves, worked in the round


USA terms

I used Dy dk with wool (about 50g og dk yarn will do)
4mm hook
stitch marker


Buy Pattern Here


Finished Items may be sold, Pattern is not for resale.
All contents © 2014 Sinead Deegan Designs. All rights reserved.  


Monday, 25 August 2014

Crochet Snoody


Ok so typically called a snood somehow I think SNOODY fits it better.
I've played around with the idea of making one for a while now so I've tried it out on a child's size approx 5-7 yrs.
I love the feel of the King Cole Comfort Chunky and am finding it very hard to move away from it at the moment , must be with winter approaching that has me drawn to this yarn. Its super soft to touch which makes it perfect for snuggly winter wears.
Autumnal colours are catching my eye, greens, browns purples all the rustic shades I'm itching to get working with.
This SNOODY is super cosy and sooo warm.


Crochet Snoody  One Size


Chunky yarn 100g x 3 balls, 6mm hook , 2 buttons

USA terms
ch - chain
hdc - half double crochet

Scarf
Ch 125 (approx. 48 inches)
Rnd 1 -   hdc in 3rd ch from hook, hdc in each stitch to end, turn.
Rnd 2 - 9,  ch2 hdc in each stitch to end, turn.


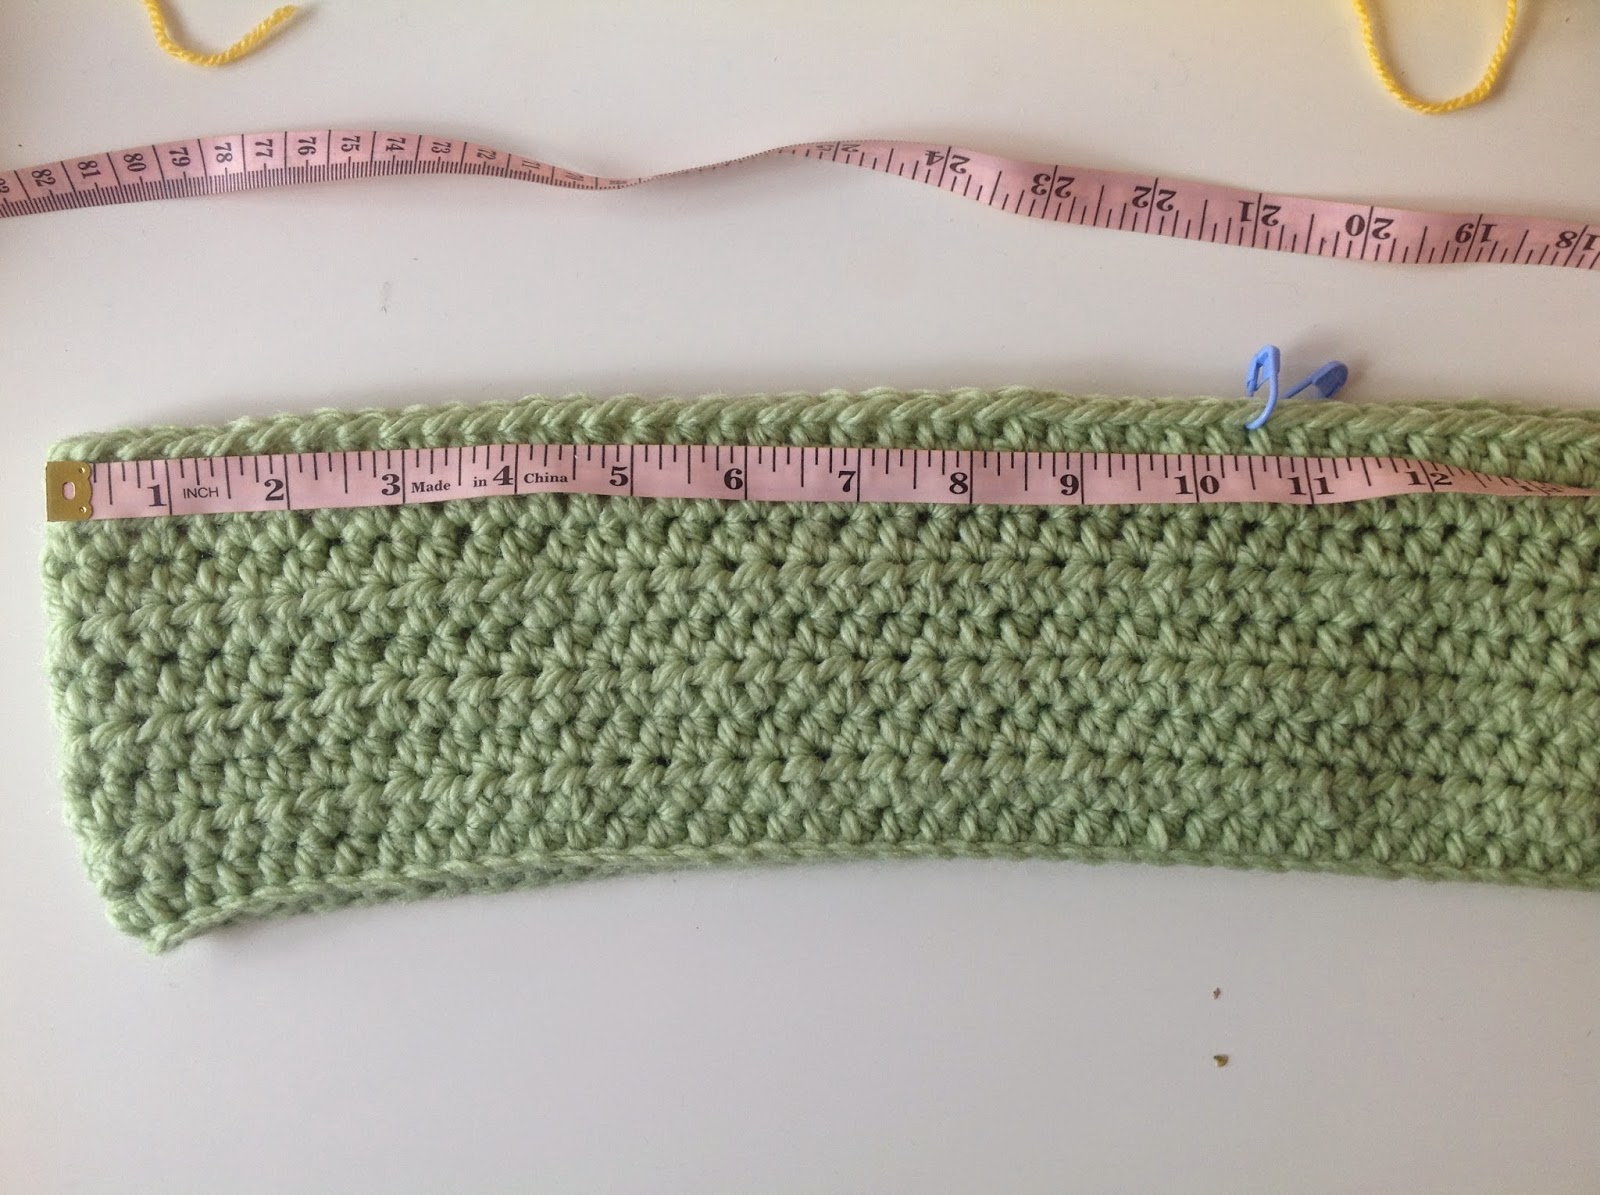
Fold scarf in half and measure 10inches down from the fold and mark with a stitch marker on each side. This marks the hood position, hood should be approx 20inches wide


Rnd 10 - join yarn in first stitch marker with slst, ch2 hdc in each stitch across ending with a hdc in 2nd stitch marker, turn.
Rnd 11 -20 , ch2 hdc n each stitch to end, turn.. fasten off

Sew up the hood seem

POCKETS x 2
Rnd 1 ch14, hdc in 3rd ch from hook, hdc to end , turn.
Rnd 2 -11 ,  ch2 hdc in each stitch to end , turn.
                 Fasten off.

Join pockets sewing  them to the bottom of the scarf fronts. I then attached a button to the front of the pockets.

Join yarn to the bottom stitch of scarf, ch1 sc in each stitch up scarf across hood and down the other side, fasten off. weave in all loose ends.




Tuesday, 19 August 2014

Confused Bee Crochet hat 0-3 months


I love the slightly confused look on the face of the bee hat !.
 Another novelty creation which I have to admit are my favourite items to make. This pattern can be modified to fit any age.


U.S.A TERMS
dk yarn, YELLOW, WHITE AND BLACK.
4mm hook
darning needle

dc - double crochet
sl st - slip stitch
ch - chain
st - stitch
sc - single crochet

NOTE: JOIN EACH ROUND TO 1ST DC NOT STARTING CHAIN.

I CARRIED THE YARN UP THE HAT THROUGHOUT AS I DIDN'T FEEL THE NEED TO FASTEN OFF AT THE END OF EACH ROW.

Using Yellow
RND 1 - Make a magic ring ch2, 12dc in ring. Join wit slst to 1st dc.
RND 2 - ch2, 2dc in same stitch and each stitch around, join.
RND 3 - ch2, 2dc in same stitch. *1dc in next st, 2dc in next stitch * repeat from *to* around, join.
RND 4 - ch2, 2dc in same stitch. *1dc in next 2 sts, 2dc in next st* repeat from *to* around, join.
RND 5 - ch2, 2dc in same stitch, *1dc in next 3sts, 2dc in next st* repeat from *to* around, join.
RND 6 & 7 , ch2, 1dc in same st and in each st to end, join.

WORK ROWS -  8, 10, 12, 14 USING BLACK
RND - 8, 10, 12, 14, - ch2, 1dc in same st and in each st to end, join.

WORK ROUNDS - 9, 11, 13, 15 USING YELLOW
RND - 9, 11, 13 - ch2, 1dc in same st and in each st to end, join.
RND 15 - ch1, 1sc in same st and in each st to end , join in 1st sc.
Fasten off and weave in the ends.


EYES (make 2)
                                                                     
Using white
magic ring, ch2, 12dc in ring join to top of ch2, fasten off. Leave about 7 inches for attaching to hat.
Using black
magic ring, ch1, 6sc in ring, join to ch1, fasten off.
Stitch the black circle onto the white eye.

ANTENNA (make 2)
Using black, ch17, slst in 2nd ch from hook and in remainding chs to end, in the last ch work a multiple of sc stitches to optain rounded shape. fasten off.

Attach eyes to front of the hat, I left a row of yellow to give room for the mouth.
Sew on a mouth using black and create a zigzag effect or whichever suits you.
Attach the antennas evenly to the top of the hat.

Finished Items may be sold, Pattern is not for resale.
All contents © 2014 Sinead Deegan Designs. All rights reserved.  


Beginners C2C stitch, cushion

  C2C - Corner to Corner For me, its possible the quickest stitch I do, blankets work up pretty quick any size from baby to Queen. Ad...